Understanding the Types of Scratches
Not all scratches are created equal. Before jumping into repair mode, it’s crucial to understand the type of scratch you’re dealing with:
- Surface-Level Scratches: These are shallow marks that affect only the finish or top layer of the wood.
- Deep Scratches: These penetrate the wood’s surface, leaving visible grooves or exposing bare wood.
Proper identification will help you choose the best repair method for a seamless fix.
Pro Tip: To quickly test the depth of a scratch, run your fingernail across it. If your nail catches, it’s likely a deep scratch that will require more extensive repair techniques.
Assessing the Damage
To effectively repair scratches, start by carefully assessing the extent of the damage:
- Inspect the Door in Natural Light: Natural lighting helps reveal the true severity of the scratches.
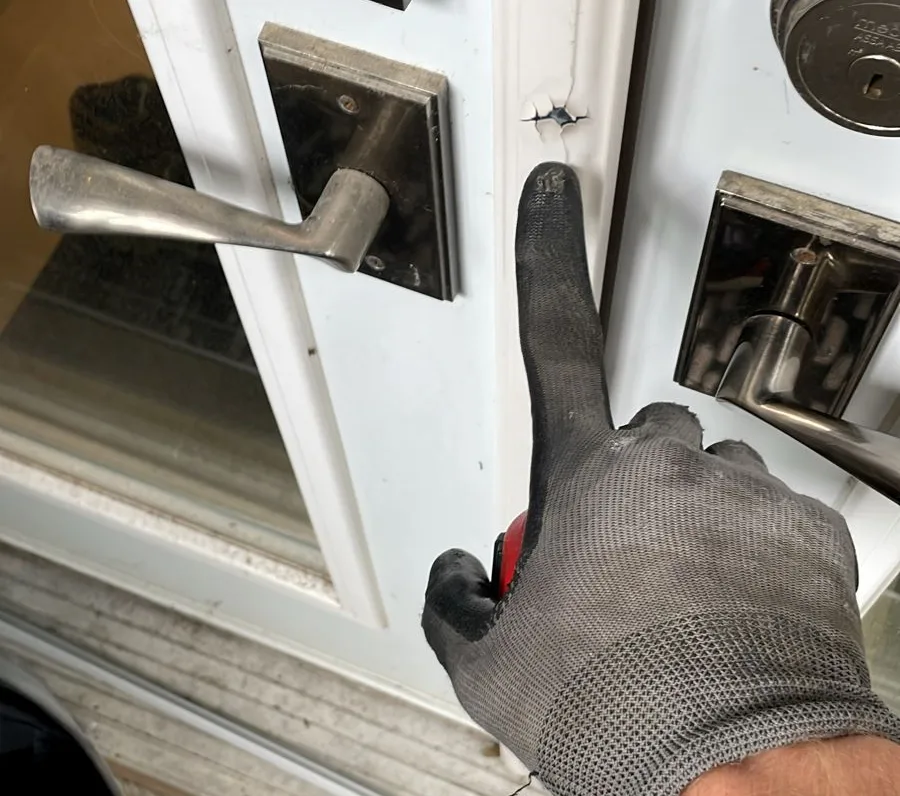
- Feel the Scratch with Your Fingertips: If your fingernail catches in the groove, it’s likely a deep scratch that may require more intensive repair.
- Identify the Finish: Different finishes—such as varnish, lacquer, or paint—demand specific repair methods, so understanding the type of finish is crucial.
Pro Tip: Use a flashlight at an angle to the surface to spot subtle scratches or imperfections that might be missed in normal light.
Essential Tools and Materials
Before you begin, make sure you have these tools and materials on hand:
- Fine-grit sandpaper
- Wood filler or putty
- Wax repair sticks
- Wood stain and sealant
- Polishing compounds
- Microfiber cloths
- Putty knife
- Wood markers (color-matched to the door finish)
Having these items ready will ensure a smoother, more efficient repair process.
Pro Tip: Keep a scrap piece of wood or an inconspicuous area of the door available for testing colors and techniques before committing to the visible surface.
DIY Methods for Surface Scratches
Surface scratches are relatively easy to fix with the right approach. Here’s how:
- Clean the Area: Wipe the scratched surface with a damp microfiber cloth to remove dust and debris. Starting with a clean surface ensures better results.
- Polish the Surface: Using a soft cloth, apply a wood polishing compound in gentle circular motions. This can minimize the appearance of shallow marks and restore the shine.
- Try a Walnut or Almond: Rub the scratch with a walnut or almond. The natural oils in these nuts can fill and darken minor scratches, blending them with the wood’s finish.
Pro Tip: For quick touch-ups, keep a pre-made wood repair marker in your toolkit. It’s an easy, mess-free way to mask minor surface scratches on the go.
Fixing Deep Scratches on Wood Doors
Deep scratches demand a more hands-on approach for a lasting repair:
- Clean the Scratch: Start by wiping the damaged area with a damp cloth to remove dirt and residue, ensuring the filler adheres properly.
- Fill the Groove: Use a putty knife to apply wood filler or putty into the scratch. Smooth it out until it’s flush with the surrounding surface.
- Let It Dry: Allow the filler to dry completely, following the product’s recommended drying time.
- Sand the Area: Gently sand the repaired spot with fine-grit sandpaper to create a smooth, even surface.
- Stain and Seal: Apply a matching wood stain to blend the repair with the rest of the door. Once dry, finish with a clear sealant to protect and enhance the look.
Fixing Deep Scratches on Wood Doors
Pro Tip: To ensure a perfect color match, test the wood stain on a small, hidden section of the door or a scrap piece of similar wood before applying it to the repaired area.
Wax sticks are a quick and effective solution for minor scratches. Here’s how to use them:
- Choose the Right Color: Select a wax stick that closely matches your door’s finish for a seamless repair.
- Warm the Wax Stick: Rub the stick between your hands or slightly heat it to soften the wax, making it easier to apply.
- Apply to the Scratch: Press the softened wax into the scratch, ensuring even coverage and filling the damaged area.
- Buff the Surface: Use a clean, soft cloth to gently polish the repaired area, blending the wax with the surrounding finish.
Pro Tip: For a smoother finish, use a plastic card or a flat-edged tool to remove excess wax before buffing. This prevents buildup and ensures the repair looks natural.
Restoring the Door’s Finish
After repairing scratches, restoring the door’s finish is key to protecting it and enhancing its appearance:
- Apply a Clear Coat: Use a brush or spray to apply a clear finish, such as polyurethane or varnish. This protects the wood and adds a polished look.
- Sand Lightly Between Coats: For a smooth, professional-grade finish, lightly sand the surface with fine-grit sandpaper between each coat. This helps the layers adhere better and eliminates imperfections.
Pro Tip: When applying the final coat, use long, even strokes and work in the direction of the wood grain for a flawless finish. Avoid over-brushing to prevent streaks.
Eco-Friendly Wood Repair Options
For those seeking sustainable solutions to repair wood surfaces:
- Opt for Non-Toxic Wood Fillers and Stains: Choose products that are free from harmful chemicals to ensure a safer environment. For instance, EcoPoxy offers high bio-content epoxies made from renewable resources, suitable for woodworking projects. Ecopoxy
- Use Reclaimed or Repurposed Materials for Larger Repairs: Incorporate salvaged wood to reduce environmental impact and add unique character to your projects. In Toronto, Canadian Salvaged Timber specializes in providing quality reclaimed woods for various applications. Canadian Salvaged Timber
Pro Tip: When selecting eco-friendly products, look for certifications or labels indicating low VOC (Volatile Organic Compounds) and environmentally safe ingredients to ensure you’re making a truly sustainable choice.
When to Call a Professional
While many scratches can be repaired at home, some situations require professional expertise:
- Extensive Damage: If large portions of the wood are damaged or the scratches are too deep for DIY repairs.
- Antique Doors: To maintain the value and authenticity of historical or vintage doors, professional restoration is essential.
- Specialized Finishes: Complex or custom finishes often need expert care to ensure seamless results.
Pro Tip: If you’re unsure about the extent of the damage or lack the right tools, it’s always better to consult a professional to avoid further harm to your door.
Contact Enlive Doors in Toronto and the GTA
Don’t leave your doors to chance! For expert door repair and restoration services, call Enlive Doors at (647) 371-5756. Let our professionals restore your doors to perfection.
Preventing Future Scratches
Keep your wood doors looking flawless by taking these simple precautions:
- Use Door Stoppers: Prevent accidental bumps and scrapes by installing door stoppers behind doors.
- Trim Your Pet’s Nails: Regularly trimming your pet’s nails can minimize the risk of scratches caused by playful paws.
- Clean with Gentle Products: Use non-abrasive, wood-friendly cleaning products to avoid damaging the finish.
- Apply Protective Wax or Polish: Periodically applying a protective wax or polish adds an extra layer of defense against everyday wear and tear.
Pro Tip: Place a decorative mat or rug near the door to catch dirt and debris, reducing the chances of abrasive particles scratching the surface.
Common Mistakes to Avoid
When repairing wood scratches, steer clear of these common pitfalls:
- Using Harsh Chemicals: Avoid products that can strip or damage the wood’s finish. Opt for gentle, wood-safe cleaners to maintain the integrity of the surface.
- Over-Sanding: Excessive sanding can lead to uneven surfaces and further damage. Sand lightly and evenly, using appropriate grit sandpaper, to preserve the wood’s natural texture.
- Ignoring Color Matching: Failing to match stains and fillers to the existing wood color can result in noticeable repairs. Always test and adjust colors to achieve a seamless blend.
Pro Tip: Before applying any repair materials, test them on a hidden area or a scrap piece of similar wood. This ensures compatibility and helps you achieve a flawless finish without unexpected surprises.
popular Scratch Repair Products available at Home Depot Canada
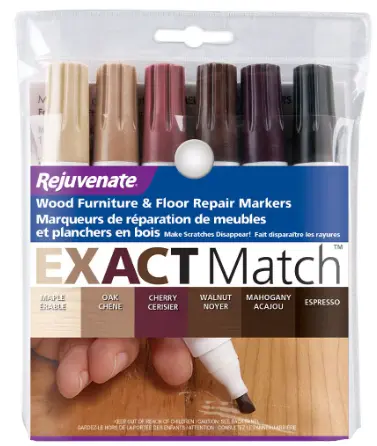
Rejuvenate Wood Furniture and Floor Repair Markers
This set includes markers that match various wood tones, such as maple, oak, cherry, walnut, mahogany, and espresso. Ideal for filling in scratches and scuffs on floors, cabinets, and furniture.
Varathane Touch-Up Marker for Furniture and Wood Repair
These markers are designed to repair minor scratches and blemishes on furniture, cabinets, moldings, and floors. Available in various shades, including Traditional Cherry and Ebony, to match different finishes.
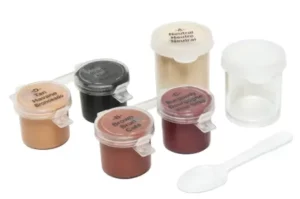
Roberts Universal Flooring, Counter, Cabinet and Furniture Repair Kit
This comprehensive kit contains five latex putties that can be mixed to match any project, making it suitable for repairing wood, laminate, and vinyl surfaces. Ideal for counters, cabinets, moldings, and furniture.
Varathane Scratch Repair Pen for All Wood Surfaces
A clear, water-based acrylic pen designed to repair minor chips and scratches on interior wood surfaces. It provides excellent wear resistance in a semi-gloss finish and is compatible with all finishes and sheens.
Trade Secret Scratch Remover for Dark Wood
This product restores the original beauty of your furniture and floors by hiding nicks and scratches. It’s safe on all finished furniture and is recommended for walnut, mahogany, ebony, cherry, and other dark wood tones.
FAQs
Use touch-up paint that matches the door’s color. Sand the area lightly before applying paint for best results.
Yes, when applied correctly, wood fillers can last for years and blend seamlessly.
Test stains on an inconspicuous area first to ensure a perfect match.
Yes, items like walnuts, olive oil, and toothpaste can fix minor scratches effectively.
For deep scratches, light sanding helps smooth the surface and prepares it for filler or stain.
Polish every 6-12 months to maintain their finish and protect against scratches.


